Git for Beginners: Basics and Essential Commands
If you are learning programming or web development, you have probably heard about Git and GitHub. Almost every company and developer uses Git, but many beginners find it confusing.
In this blog, I will attempt to explain Git from absolute basics in a simple way.
So, First things first,
What is Git?
Git is a Distributed Version Control System.
Not so much enlightening, right?
In simple words, Git helps you track changes in your code, save versions of your project, and collaborate with other developers safely.
Imagine you are working on a project:
To manage a project effectively, you need a workflow that allows you to consistently save checkpoints of your progress, ensuring that every significant step is recorded and secure. This historical record provides the safety net required to instantly go back to a previous version if something breaks, effectively eliminating the risk of irreversible errors
But why is Git called “Distributed”?
This is because:
Every developer has a full copy of the project and its history
You don’t need the internet to save changes (commit)
No single server can destroy your project
Why is Git Used?
Git is used to:
Track the history of code (what part and when the code was updated)
Undo mistakes
Work with teams
Build features in isolation (branches)
Merge code from multiple developers
Platforms like GitHub, GitLab, and Bitbucket are built on top of Git.
Fun Fact - Many developers/coders in their early journey think Git and GitHub are the same, and I would like to confess that I too was one of those😅; no need to get embarrassed, it’s a phase, and you eventually grow out of it.
Remember, Git works locally on your machine as a version control system, tracking the changes in your code. GitHub lives on the cloud as a platform where developers store and share their Git repositories. They’re related but fundamentally different tools.
Git Core Terminologies
Core Concepts
Repository (Repo): The storage space where your project's files and entire revision history are kept(or simply put, it is just the file structure of your project, along with timestamps/snapshots whenever any file was modified/created/deleted)
Working Directory: The local folder on your computer where you are currently editing and modifying files.
Staging Area (Index): A holding ground where you list and prepare changes before officially saving them to history.
Commit: A saved snapshot of your project at a specific point in time, acting as a permanent checkpoint.
Branch: A parallel version of your repository used to develop features in isolation without affecting the main code(like a branch of a tree attached to the main trunk).
HEAD: A reference pointer that indicates the specific branch and commit you are currently looking at, i.e., your latest commit
Git basic Actions & Commands
git init: The very first command that we need to enter to initialise a new repository. Note:- remember the repo will be initialised from the root of the folder where you entered the command.
Command:-
git initgit status: This command can be used to check the status of the files that are present under the root of your repository. Command:-
git statusThe status can be of different types:-
Current branch information – Shows the branch you are on and, if tracking a remote branch, whether it is ahead or behind in commits.
Staged changes – Files that have been added to the staging area and are ready to be committed.
Unstaged changes – Files modified in the working directory but not yet staged.
Untracked files – Files not tracked by Git and not ignored by .gitignore.
Merge conflict details – If a merge is in progress, it lists files with conflicts.
git add: This command is used so that git can know which files need to be tracked. We need to enter the names of the files that need to be tracked.
Command:-
git add FILE_XFILE_X is the name of any file that we are targeting. Another version of this command is -git add .This command will add all the new/modified files.git commit: This command is used to save the files and prepare them in the staging area so that they are ready for a push into the repo. This command is often used to save the changes together with a message, which helps us easily discern the changes.
Command:-
git commit -m “Add your message here”git push: Uploading your local commits and history to a remote repository (like GitHub or GitLab).
Command:-
git push origin mainThis command pushed the committed changes to the main branch of a preset origin.git pull: Downloading changes from a remote repository and immediately merging them into your local branch.
Command:-
git pull origin branchNameRemote: A common repository on a server (like GitHub) that allows multiple people to exchange changes. This command allows us to push our commits to a remote server where we can maintain a repository for others to access. Also known as Origin
command-
git add origin <repo-url>Branch: Creating a separate branch from the main branch, changes from the main branch can be accommodated using pull, meanwhile the features you created in your own branch can be pushed to the main branch wether directly(rarely) or via pull requests to the main branch(mostly).
command:-
git branch branchNameTo create a new branch, alternativelygit branchcan also be used to know the current branch.Checkout: It is a command used to switch between different branches or restore files from previous commits.
command:-
git checkout branchName
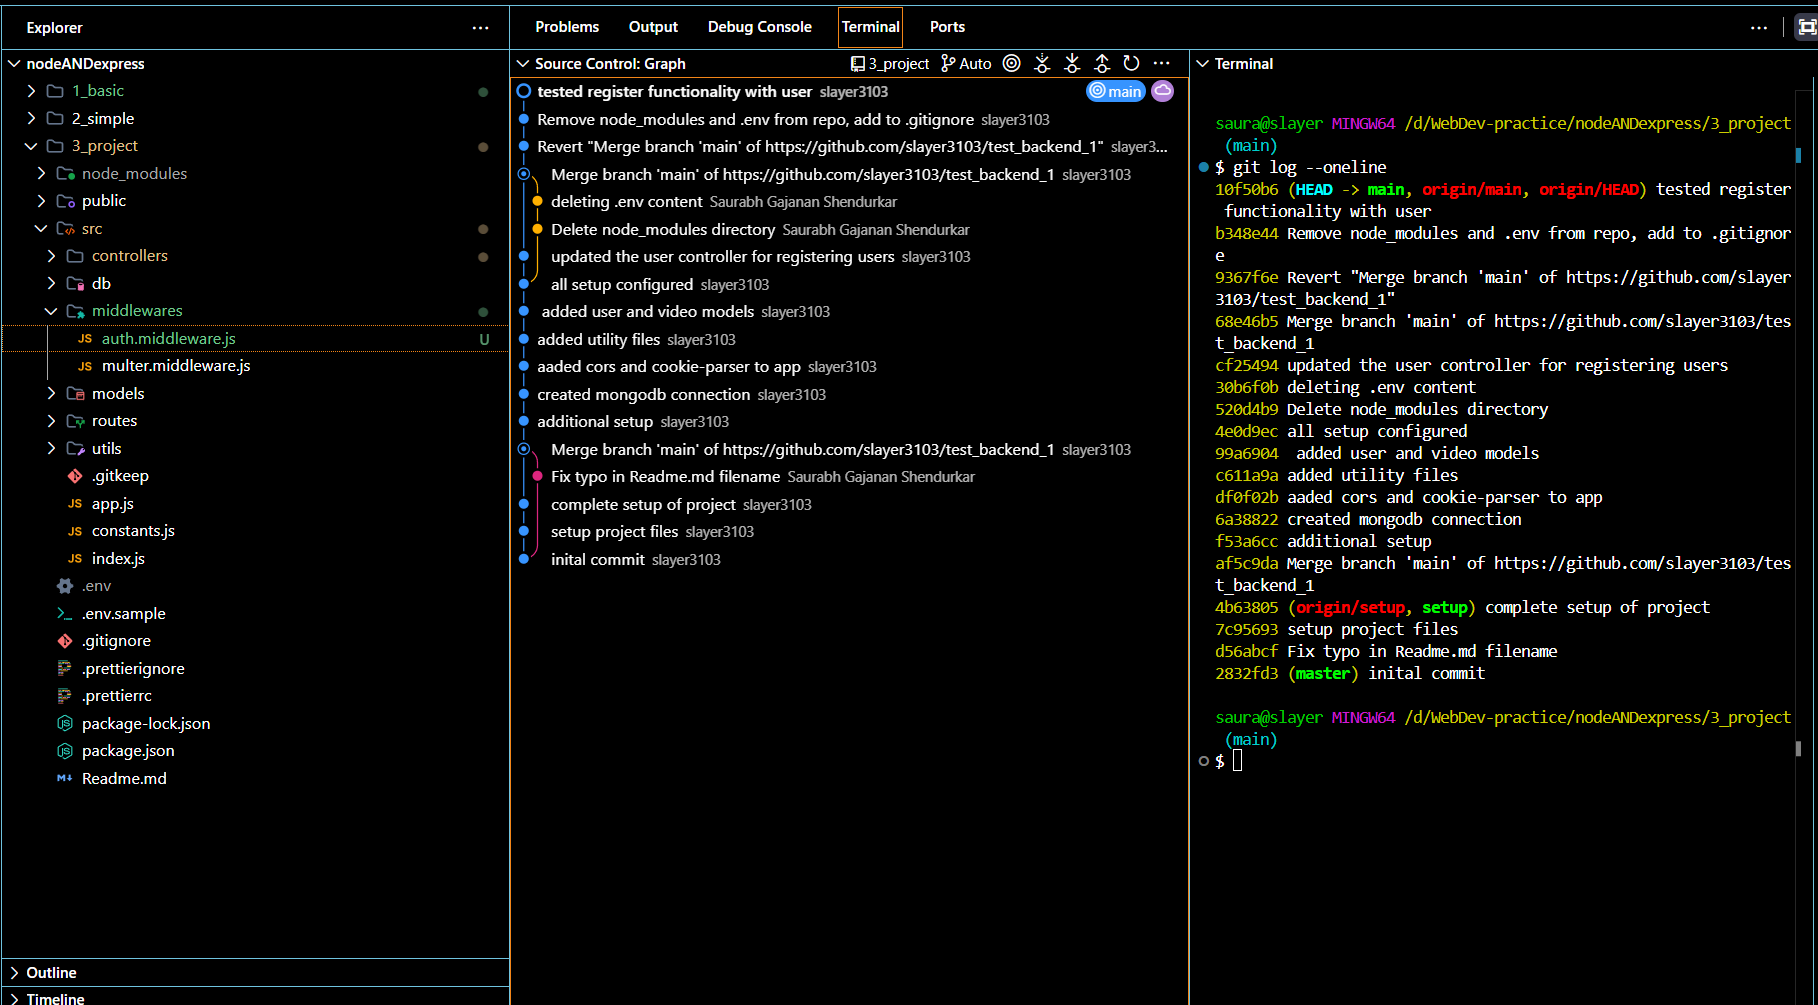
Fig- Local repository structure overview of a project with git used as version control and distributed teamwork
Conclusion: Mastering the Time Machine
Git might feel a bit overwhelming at first with its terminal commands and abstract concepts like "staging areas" and "branches." That is completely normal. Remember, even senior developers often find themselves Googling specific Git commands!
However, understanding the basic workflow—git add (stage), git commit (save), and git push (upload)—is 90% of the battle. By mastering these essentials, you aren't just memorizing commands; you are giving yourself a safety net. You are ensuring that no matter how much you break your code while experimenting, you can always go back to a version that worked.
Start small. Create a dummy folder, initialize a repository, and practice modifying files and committing them. The more you use Git, the more it will become muscle memory.
Welcome to the world of version control—your future self will thank you for learning this today!
Happy Coding!


